PictureCorrect.Com – Flash Photography Tips

Flash Photography Tips

Flash photography is the use of a camera flash bulb in a variety of possible situations where there doesn’t seem to be enough light. The most common use of flash photography is group portraits at gatherings where there is not enough light to take a satisfactory exposure.

flash photography tips

“Tim and Becks Proctor” captured by Simon Burt (Click Image to See More From Simon Burt)

But there are many other situations where the flash could be used such as: fill-flash situations when the background is brighter than the subject, using the flash to light up a room and creating better coloring, or using the flash to freeze a moving object in a dark situation.

Indoor Flash Photography

In typical indoor situations there will probably not be enough light to take a normal hand-held well-exposed photo. There are many indoor flash photo opportunities you may be faced with. You may want to cast light on a group of people for a portrait photo. You may want to throw light into a room for an architectural photo. Or you may just want to cast light on certain objects in a lighted room that appears too dark for an exposure.

If your camera’s auto-exposure settings say that the photo would require a shutter speed slower than 1/60 of a second then you probably shouldn’t hand-hold the camera or the photo would come out blurry. The reason it would come out blurry is because the shutter would be open long enough for any minor hand shake to distort the composition. The use of a tripod or faster film will probably be needed but many of us do not regularly carry a tripod. Most photographers simply use their flash bulb when they are inside.

indoor flash photography

“on the couch” captured by Jason Lavengood (Click Image to See More From Jason Lavengood)

In order to take effective indoor flash photos there are some techniques you should keep in mind. When using the flash do not point it directly at a mirror or glass that will create a lens flare or just ruin the photo. Stand close enough to your subjects so the flash is actually effective (four to ten feet). Try to make sure your main subjects are about the same distance away from the flash as each other or some that are closer to the flash will appear brighter than ones that are farther away.

Fill Flash Situations

Fill flash fills in the areas of a photo that would normally appear too dark. Fill flash can be used for sunny day portraits for shadows on a subject’s face or to fill any shaded area that is out of the sunlight. Fill flash can also be used to cast light into a room where there are no windows. Fill in flash is ideal for back-lit and side-lit situations. In a backlit situation there will be a lot of light in the background but no or little light cast on the front of the subject.

This would normally create somewhat of a silhouette effect, but with a fill flash it would balance the photo nicely. But in order for this technique to work, you must be careful to stay in flash range which is usually around four to ten feet. With common cameras in order to add fill flash to a photo just toggle the flash to go off when it normally would not be needed.

types of flash photography

“Limedrop” captured by Paul Greene-Taylor (Click Image to See More From Paul Taylor)

Other Types of Flash

Many newer cameras now have a red-eye reduction mode where the flash may fire before the picture is taken in order to cause the subjects’ pupils to contract. The red-eye reduction modes in newer cameras are surprisingly effective and many work in different ways to contract pupils.

A slow sync flash is for more complicated exposures and is used commonly to create blurry long exposures. The flash fires at the beginning of the exposure, but the shutter still stays open for a moment after the flash has fired. This can freeze a car at dusk and create a blurry streak in the cars path. Or the slow sync flash could capture a sunset and freeze a closer subject that is moving through the frame. There are countless situations where a slow sync flash could possibly be used to enhance an exposure. There are also other versions of the sync flash such as the rear sync flash (where the flash fires at the end of an exposure) or the stroboscopic flash (where the flash fires multiple times throughout an exposure).

Many photographers also choose to bounce the flash off a wall or ceiling to get a softer diffused kind of light commonly sought after for portraits. This kind of flash technique requires a flash that can be aimed in a direction that the camera is not pointed. It takes practice to refine this technique but many professionals come to use this method almost exclusively.

Conclusion

Practice using flash in your photos even when it is not necessarily needed and pay attention to your results. The best way to become better at flash photography is to analyze your photos and try to figure out what you could have done differently in order to create a better flash-filled exposure.

Go to full article: Flash Photography Tips

What are your thoughts on this article? Join the discussion on Facebook or Google+

Article from: PictureCorrect Photography Tips

Copyright © 2003-2013 PictureCorrect, Inc. All Rights Reserved.

PictureCorrect.Com – P Mode on Digital SLR Cameras

P Mode on Digital SLR Cameras

It seems that some folks are determined to make photography more difficult than it has to be. You might hear some photographers say, “I only shoot using the manual exposure mode” while others might say, “I only use the Aperture or Shutter Priority exposure mode”.

That is fine and well for those who understand the basics of camera exposures. It is also great to use those shooting modes when a change of the lens aperture opening and/or shutter speed setting will give better results for an image. But, is it really necessary to fumble with exposure controls for every shot? No, not really. That is why all cameras have Automatic Shooting Modes. Pictures taken using the automatic mode will generally come out pretty good. When you use the automatic mode, the camera will choose just about every setting for you to get a proper exposure; however, there are times when changing certain camera settings will produce a better image. Unfortunately, those settings cannot be changed when you are shooting in the automatic mode.

“The Photographer” captured by Jan Maklak. (Click image to see more from Jan Maklak.)

What Is Program Mode?

Let me introduce you to the Program mode. The Program or “P” mode is similar to your camera’s automatic mode because it will automatically set a proper exposure value for your shot. (as far as the lens aperture opening and shutter speed).

What makes using the Program mode different than shooting in automatic is that you will have control over most camera settings while the camera chooses the best exposure values. The settings that you will be able to control in the Program mode will include the ISO, light metering, focusing, and flash settings.

Every Digital SLR camera and Mirrorless camera has a “P” mode setting. However, most basic compact cameras won’t have a program mode

So, the Program mode is good for learning how to use different camera settings without having to worry about obtaining the proper exposure as well. You can use The Program mode for spur of the moment shots without messing up too many pictures due to bad exposure settings. You can always experiment with manual settings when getting the shot exactly “right” is not critical.

Take note that the lens aperture and shutter speed settings can be controlled to an extent in the “P” Program Shift mode. We will discuss that a little more in just a bit.

“Becoming Photographer” captured by Christian Minuc. (Click image to see more from Christian Minuc.)

When To Use Program Mode

But first, let’s take a look at a couple of picture taking situations when the Program mode can be useful. Let’s say you are taking pictures of a scene with very bright as well as dark shaded areas. Sometimes in a situation like that, your camera’s light meter can be fooled and produce an underexposed or overexposed image.

If you are using the program mode you can set your camera to Spot Metering and read the light from a small area rather than reading the light from the overall scene. That will give you a proper exposure for the part of the scene or subject that you think is the most important. (the camera will set the exposure values) You would not be able to use spot metering if you were shooting in the automatic mode.

Here is another scenario in which the program mode can be useful. Let’s say your camera is set to a focusing mode that covers a wide area of the scene you are viewing. If you are trying to take a picture of a flower that is close to other flowers or leaves, the camera might focus on the wrong flower.

That’s not a big problem if you are in the program mode. Just change your camera’s focusing mode so that it zeros in on the exact area that you want to be in focus. Once again, you would not be able to perform this function if you were using the automatic mode.

“New” captured by Nate Pliskin. (Click image to see more from Nate Pliskin.)

So, the point is that just about any camera setting that you may use in the manual mode can be used in the program mode. Once again, remember that the lens aperture and shutter speed are automatically set for you when you use the P mode.

Fine Tuning Program Mode

As previously mentioned, the aperture and shutter speed can also be adjusted somewhat in the P mode. For example, once you compose a picture and press the shutter half way down, you will be able to see the lens aperture and shutter speed the camera has chosen on the LCD screen. If you think the shutter speed might be too slow, there will be a dial on the camera that you can rotate or a button to press to change the shutter speed.

(This will be called using the Program Shift or Flexible mode. It is part of the regular Program mode. Check your camera’s instruction manual for more precise instructions)

What will happen once you change the shutter speed is that the aperture will be changed accordingly to maintain a correct exposure. If it is the aperture setting you want to change, just move the dial or button in the opposite direction. You will be able to choose the aperture setting you want and the camera will set the shutter speed for a proper exposure.

Some will say that the same type adjustment can be done using the aperture or shutter priority modes. That is very true. But again, one of the main reasons to use the Program mode is so that you don’t have to worry about setting apertures or shutter speeds. However, it is good to have the option of quickly adjusting them in the Program mode if you choose to do so.

While using the Program mode can be very useful, it is also a good idea to learn how to use the Aperture Priority, Shutter Priority, and Manual modes as well. Eventually you will figure out which one might be your first choice.

About the Author:
If you need to learn more about the Camera Lens Aperture, the Camera Shutter, and ISO, feel free to visithttp://easybasicphotography.com/Camera-Exposure-basics. There are plenty of other photography tips and topics at the site to help you better understand the basics of photography.
Go to full article: P Mode on Digital SLR Cameras

What are your thoughts on this article? Join the discussion on Facebook or Google+

Article from: PictureCorrect Photography Tips

Copyright © 2003-2013 PictureCorrect, Inc. All Rights Reserved.

PictureCorrect.Com – How to Avoid Blurry Photos

How to Avoid Blurry Photos

I’ve heard too many new photographers telling me that they were often frustrated with blurry photographs being captured. They did not know what the reasons were, nor were they able to resolve this issue effectively.

We always understand that knowing the source a of problem can help in problem solving. In this article, I am going to share with you some key reasons that cause blurry photographs. After helping you better understand the problem, I will go on to share how to capture sharp photographs like a professional photographer.

“***” captured by Serjio. (Click image to see more from Serjio.)

Focus Settings:

One of the common reasons for blurry photographs is having a wrong focusing point. It is important that you know exactly where to focus before composing the frame and pressing the shutter button. For example, when photographing portraits, professional photographs will typically focus on the model’s eyes. It is very important that your model’s eyes are sharp and in focus in the photographs. This is especially so if you are using a wide aperture where depth of field is shallow.

Instead of using matrix focusing, 51 point focusing or other fanciful technology, I strongly recommend using single point focus. It must be the photographer telling the camera where to focus, rather than having the camera make this important decision for us.

Although technology advances in leaps and bounds, a camera’s intelligence is still unable to read a human’s mind. The camera will not know exactly where or which area in the frame we want to focus on. Therefore, always reserve the rights to make this important decision yourself.

Setting a Fast Enough Shutter Speed:

Another key reason causing blurry photographs is having a shutter speed that is too slow. A slow shutter speed will likely cause “camera shake”, especially when you are holding the camera without any sturdy support.

The general rule of thumb to prevent “camera shake”, is to have the denominator of the shutter speed 1.5 times greater than the focal length. In other words, if your focal length is 50mm, your shutter speed shall be at least 1/80 seconds to avoid blurry photographs. If your focal length is at 100mm, your shutter speed shall be at 1/160 seconds or faster.

Using a Tripod:

The other get around is using a tripod for enhanced stability. This technique is good for landscape photography or photographing static objects. Pressing the shutter button may potentially cause “camera shake” too. As such, it is a good habit to use a remote shutter or camera’s self-timer when your camera is mounted on a tripod.

“Macro” captured by Trek. (Click image to see more from Trek.)

Firmly Holding the Camera:

When not using a tripod, ensure you are holding your camera using the correct technique. If you are holding your camera to shoot, your left hand acts as a support and your right hand serves to adjust the settings and press the shutter button.

With the above information, I am sure you now understand who the main culprits for blurry photographs are. More importantly, you know how to resolve the problem. With that, what are you waiting for? Grab your camera, start shooting, and have fun!

About the Author:
Yong Sak is a passionate Singapore Freelance Photographer who enjoys taking photographs and sharing his knowledge on photography. He owns a Photography Portal which houses many Basic Photography Fundamentals which are essentials for those who are new to photography and are hungry for more information.
Go to full article: How to Avoid Blurry Photos

What are your thoughts on this article? Join the discussion on Facebook or Google+

Article from: PictureCorrect Photography Tips

Copyright © 2003-2013 PictureCorrect, Inc. All Rights Reserved.

PictureCorrect.Com – Six Reasons to Try Long Exposure Photography

Six Reasons to Try Long Exposure Photography

This article is written by Andrew Gibson, author of this new eBook: Slow – The Magic of Long Exposure Photography

The purchase of a nine stop neutral density filter two years ago changed my approach to landscape photography. It allowed me to take photos using shutter speeds of one minute or longer and gave me a new way of photographing the sea (I live on the coast at the bottom of New Zealand’s North Island).

long exposure photo

17mm, 30 seconds @ f11, ISO 800

Long exposure photography is very enjoyable and rewarding, and if you haven’t tried it yet then what are you waiting for? Here are some reasons you should:

1. Long exposure photography is easy. It’s a very simple and pure genre of photography. It’s just you, the camera, a wide-angle lens and a tripod. The success of the shoot comes down to the drama of the landscape and your eye for light and composition. If you shoot at dusk, a neutral density filter isn’t required as the low light will let you use shutter speeds of 30 seconds or longer.

landscape exposure

40mm, 201 seconds @ f13, ISO 200

2. Longer exposures help you appreciate the beauty of the landscape. One of the things I like about it is the natural slowness of the process. It gives me time to slow down and enjoy the beauty of the landscape and the light.

3. No reciprocity failure. Long exposure photography has become popular since the rise of digital cameras. The instant feedback of the LCD screen, plus the lack of reciprocity failure take the guess work out of exposure, leaving the photographer to concentrate on light and composition.

light trails with long shutter speeds

17mm, 6 seconds @ f5.6, ISO 400

4. If you have a nine or ten stop neutral density filter, you can take photos during the middle of the day during overcast conditions that traditionally are not considered suitable for landscape photography. Neutral density filters give you a new way of taking landscape photos, and extend the time in which you can create beautiful images way beyond the golden hour.

nd filter picture

23mm, 30 seconds @ f14.5, ISO 400

5. Long exposure photography appeals to photographers who work in black or white or see themselves as fine art photographers. The simple style and composition of the best long exposure photos lends itself to the fine art approach.

6. Long exposure photos are a new way of looking at the landscape. When a non-photographer sees a long exposure photo, they know that they can’t get the same result themselves on their compact cameras or smart phones.

motion lights imagery

40mm, 1.5 seconds @ f11, ISO 400

The photos in this article are all taken from Slow, which explores multiple ways of using slow shutter speeds creatively; including panning, slow-sync flash, intentional camera movement and long exposure photography.

How to Get a Discounted Copy:

Only a few days left in the launch sale, if you use the promotional code SLOW4 at checkout, you can have Slow for just $4 OR another option is using the code SLOW20 to get 20% off five or more eBooks from the Craft & Vision collection. These codes expire at 11:59pm Nov 18, 2012.

It can be found here: Slow – The Magic of Long Exposure Photography
Go to full article: Six Reasons to Try Long Exposure Photography

What are your thoughts on this article? Join the discussion on Facebook or Google+

Article from: PictureCorrect Photography Tips

Copyright © 2003-2012 PictureCorrect, Inc. All Rights Reserved.

PictureCorrect.Com – Photographing in Dark Indoor Settings

Photographing in Dark Indoor Settings

Here are several tips to help you capture the best images in dark indoor settings.

1. Camera Stability. You will be taking long exposures, and any camera motion could impact the quality of the image. Try to utilize a monopod or stabilize the camera on the back of a theater seat. Do not hold the camera in front of you without support.

indoor photography

“the sanctuary” captured by Federico (Click Image to Find Photographer)

Some cameras and lenses have stabilization features which help, but will not be able to compensate for large movements in the camera. If you have an SLR, you may want to tuck your elbow into your belly, relax, hold your breath and gently press the shutter button.

2. Equipment. A digital SLR with a fast (2.8 or better) lens and the ability to capture images cleanly at high sensitivity is best. If you are using a point and shoot, you may have some challenges in getting clean images in a dark room.

3. Flash Off. Most indoor settings that allow photography specifically state “no flash photography”. In many cases, you’ll just ruin the existing lighting, distract the other viewers and get yourself ejected from the event. Also, from seating distance and angle, many on-camera flashes will be largely ineffective.

indoor photography wedding

Photo captured by Dmitriy Bashaev (Click Image to Find Photographer)

4. Exposure parameters. You will generally need to set your camera for high ISO or sensitivity (800 to 1600, some newer cameras will go to 3200 or more), low shutter speed (depends on your subject), and wide open F-stop (2.8 to 4.0). For those of you with point and shoot cameras, there may be a “night mode” or other preset which will attempt to deal with these conditions.

5. Shutter Speed. Integral to the exposure parameters above, you’ll need to set a preferred shutter speed for the activity being photographed. Indoor sports events are often well lit, but you’ll still want to stop motion at 1/120 or faster speed. Indoor dance performances may be much darker, but also require at least 1/60 to 1/100 to stop motion.

Speeches and plays may have less motion, so you may be able to drop below 1/60. For images of still items such as museums, you can afford to drop to a low speed to get a better exposure at higher f-stop or lower sensitivity. Just remember that low shutter speed amplifies the need for camera stability.

indoor photography ballet

“Girl on the chair” captured by Arman Zhenikeyev (Click Image to Find Photographer)

6. Underexposing. Sometimes, to get the right shutter speed, you may not have enough sensitivity and aperture to get a good exposure. Instead of lowering the shutter and getting a guaranteed blurry image, keep the shutter where you need and underexpose the image. In your image editor, you can push the exposure a couple of stops and get a good image, even though it looked too dark on the camera preview.

7. White Balance. Getting this right in the camera will save you time. Many SLR’s have a white balance custom fuction, where you photograph a white or gray image and tell the camera to use that for your white reference. If you can’t do that, try the canned settings on the camera and review the playback of samples to see the best playback of color tones to the actual room colors. Or, you can shoot RAW and fix it at import.

8. Focus. Often cameras will have trouble focusing in dark settings. You may want to switch to manual focus, compose a test shot at the same distance to your subject, playback and zoom in the image to verify crisp focus on your subject. Then you’ll avoid the “hunting” and missed focus of your images when the action starts.

indoor photography hallway

“launching” captured by Federico (Click Image to Find Photographer)

9. Post Processing. I already mentioned pushing dark images and adjusting white balance. Another good tool for dark image editing is noise reduction. When you shoot at high ISO, you often get digital noise on the image. Running a noise reduction will remove some of that noise, but at the expense of image detail or sharpness. You’ll have to weigh the amount and benefits of noise reduction in your case.

Please make sure that you don’t take photos where you are not allowed, but given permission and these techniques, you can take some great indoor images in dark settings!

About the Author:
John Huegel is a photographer in the Erie, Pennsylvania area who specializes in Seniors, Dance Studio, Families and other groups (http://jhphotomusic.com). He is active in many charitable and volunteer activities in the Erie area.

Go to full article: Photographing in Dark Indoor Settings

Copyright © 2003-2012 PictureCorrect, Inc. All Rights Reserved.

iPhoneography – Still Life

I Love Love

  • Camera: Apple iPhone 5
  • Natural Light – Side lit
  • Paper Background

© Copyright 2012 Robert Mark Elliott (Photographer), All Rights Reserved.

iPhoneography – Plants

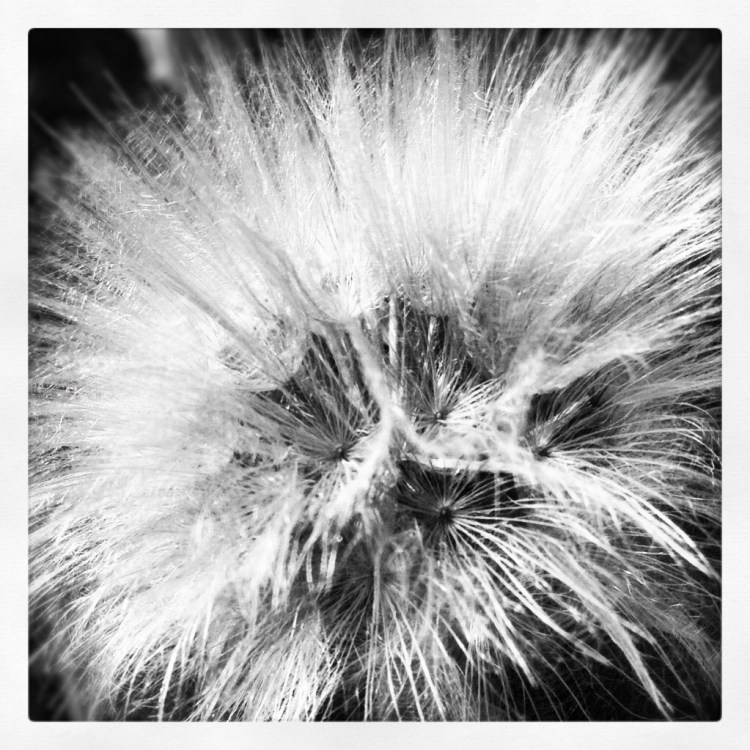
Dandelion Seed Head

  • Camera: Apple iPhone 5

© Copyright 2012 Robert Mark Elliott (Photographer), All Rights Reserved.

© Copyright 2012 Robert Mark Elliott (Photographer), All Rights Reserved.

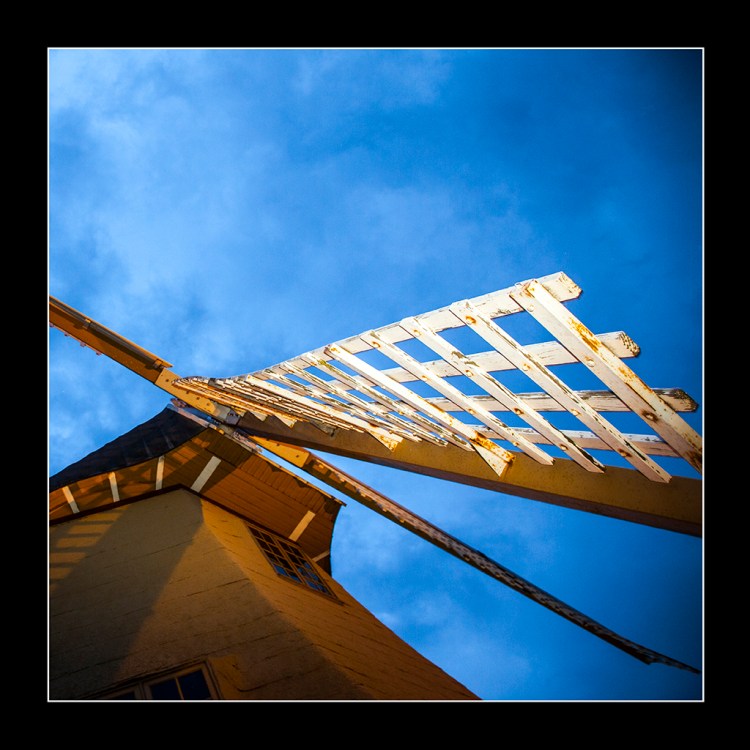
The Windmill

Image 4800 – The Windmill

Grabbed this shot at a recent wedding shoot when I had a break for five minutes.
 
  • Camera: Canon EOS 5D Mark II
  • Lens: EF 24-105mm f4L IS USM
  • Focal length: 24mm
  • Exposure: 1/60sec f/5.6 @ ISO 1600
  • Method: Handheld / Available Light /Flash – Evening
  • Post processed in Photoshop CS6

© Copyright 2012 Robert Mark Elliott (Photographer), All Rights Reserved.

Beechworth Cemetery

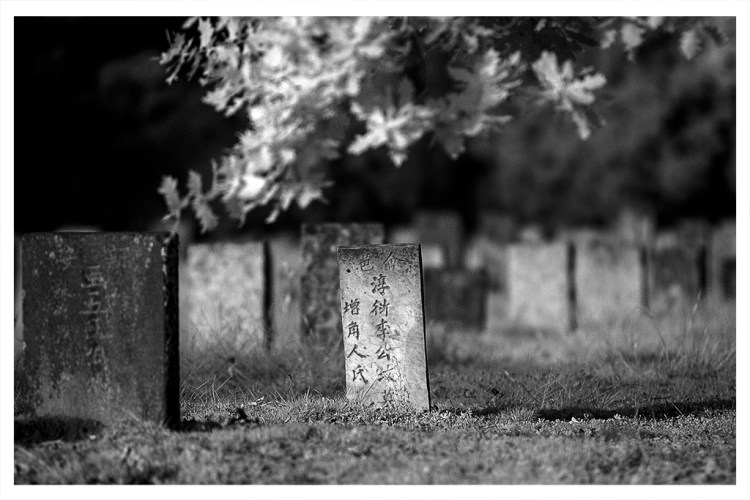
Beechworth Cemetery  contains the graves of many Beechworth’s pioneers; the Chinese Cemetery is the resting place for approximately 2000 Chinese.

The current Beechworth Cemetery was opened in 1856 to replace the original cemetery which was located in Loch Street for the period 1853 to 1856 on the site of the old Congregational Church which still remains. Located on Balaclava Road the Beechworth Cemetery is divided in to the various religious denominational sections including the Beechworth Chinese Cemetery and the pioneer graves which were moved from the Loch Street cemetery in 1857.

http://www.beechworth.com.au

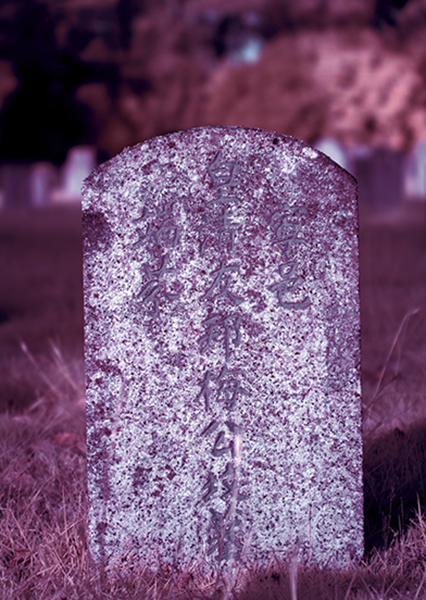
Chinese Cemetery – 4273

  • Camera: Canon EOS 40D (IR  Converted)
  • Lens: EF 70-200mm f2.8L IS USM
  • Focal length: 155mm
  • Exposure: 1/800sec f/2.8 @ ISO 200
  • Post processed in Photoshop CS6

© Copyright 2012 Robert Mark Elliott (Photographer), All Rights Reserved.

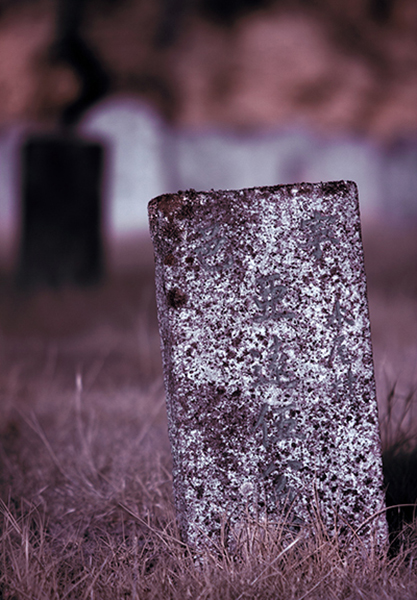
Chinese Cemetery – 4249

  • Camera: Canon EOS 40D (IR  Converted)
  • Lens: EF 70-200mm f2.8L IS USM
  • Focal length: 78mm
  • Exposure: 1/160sec f/2.8 @ ISO 200
  • Post processed in Photoshop CS6

© Copyright 2012 Robert Mark Elliott (Photographer), All Rights Reserved.

Chinese Cemetery – 4251

  • Camera: Canon EOS 40D (IR  Converted)
  • Lens: EF 70-200mm f2.8L IS USM
  • Focal length: 80mm
  • Exposure: 1/160sec f/2.8 @ ISO 200
  • Post processed in Photoshop CS6

© Copyright 2012 Robert Mark Elliott (Photographer), All Rights Reserved.

Chinese Cemetery – 4252

  • Camera: Canon EOS 40D (IR  Converted)
  • Lens: EF 70-200mm f2.8L IS USM
  • Focal length: 165mm
  • Exposure: 1/160sec f/2.8 @ ISO 200
  • Post processed in Photoshop CS6

© Copyright 2012 Robert Mark Elliott (Photographer), All Rights Reserved.

Chinese Cemetery – 4274

  • Camera: Canon EOS 40D (IR  Converted)
  • Lens: EF 70-200mm f2.8L IS USM
  • Focal length: 155mm
  • Exposure: 1/800sec f/2.8 @ ISO 200
  • Post processed in Photoshop CS6

© Copyright 2012 Robert Mark Elliott (Photographer), All Rights Reserved.

Chinese Cemetery – 4275

  • Camera: Canon EOS 40D (IR  Converted)
  • Lens: EF 70-200mm f2.8L IS USM
  • Focal length: 200mm
  • Exposure: 1/800sec f/2.8 @ ISO 200
  • Post processed in Photoshop CS6

© Copyright 2012 Robert Mark Elliott (Photographer), All Rights Reserved.

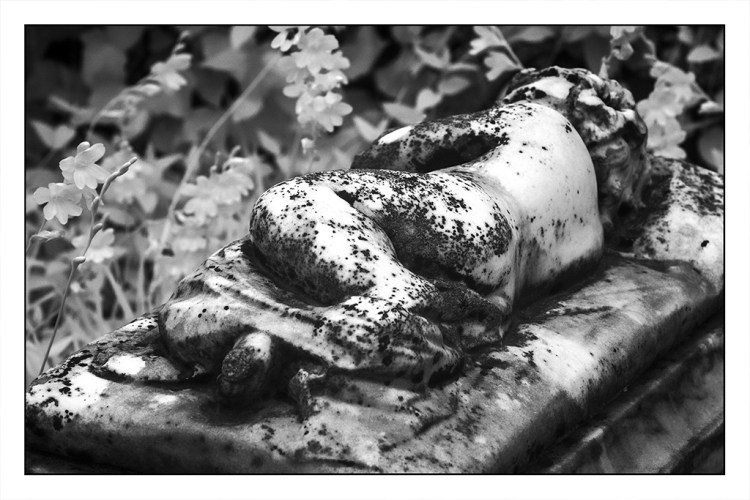
Cemetery – 4302 (Little Charlie)

  • Camera: Canon EOS 40D (IR  Converted)
  • Lens: EF 70-200mm f2.8L IS USM
  • Focal length: 70mm
  • Exposure: 1/400sec f/2.8 @ ISO 200
  • Post processed in Photoshop CS6

Little Charlie

© Copyright 2012 Robert Mark Elliott (Photographer), All Rights Reserved.

Cemetery – 4306 (Gammon Children)

Grave of seven Gammon Children of Beechworth who died from 1862 – 1872

  • Camera: Canon EOS 40D (IR  Converted)
  • Lens: EF 70-200mm f2.8L IS USM
  • Focal length: 70mm
  • Exposure: 1/500sec f/2.8 @ ISO 200
  • Post processed in Photoshop CS6

© Copyright 2012 Robert Mark Elliott (Photographer), All Rights Reserved.

PictureCorrect.Com

How to Bounce a Flash: Professional Guide

So… You get pretty good results shooting in natural light, but every time you use your flash, you suck! Washed out faces and dark backgrounds, yuk! You know it’s time to master flash-lighting, but who can afford expensive studio lights, soft boxes, backgrounds, etc?

bounce flash

Three Speedlights Used: 105mm lens, F7.1 x 1/200 sec., ISO 400, WB 6000K. 3 speedlights bounced off of 3 white plastic 4’ x 4’ DIY reflectors attached to 3 walls of the baby’s bedroom. One is behind the camera, one left and one right of camera, slightly behind the baby.

You don’t need all that stuff to get professional results. Bounce your speedlights on location! Almost any quality of light can be produced when you know how!

Bouncing light usually softens it. (Bouncing into mirrors and shiny surfaces are the exceptions.) How soft is determined by the size of the surface the light is bounced off of. The larger the surface, the softer the light is.

speedlight flash photography

One On-Camera Speedlight Used: 150mm lens, F5.6 x 1/100 sec., ISO 400, WB 6000K. On-camera speedlight bounced against a 4’ x 4’ white plastic DIY reflector attached to a wall, left of subject. A small mirror close to subject created the bright highlight on the baby’s head.

This article demonstrates the following techniques:

  • Bouncing one speedlight
  • Bouncing multiple speedlights
  • Light modification and control
  • Lighting in tight quarters
  • Creating a lighting ratio
  • Dragging the shutter

The keys to effective bouncing are:

  1. Neutral color – Avoid nasty color shifts
  2. Create a lighting ratio – Not just flat even boring light
  3. No hot spots in the image area (blown out white areas where the direct flash is striking)

Neutral Color

Bouncing works wonderfully when the bounce surface is neutral in tone, preferably white. Unfortunately, with modern construction there are few white walls available. Avoid bouncing light off of colored surfaces. The light you create will be the same color and probably cause you post-production nightmares.

Ceilings are usually white, but just bouncing off the ceiling can cause shadowed eye sockets (raccoon eyes). You need some light to strike your subject from a lower angle. Seek out the white areas of interiors, such as doors, window shades, etc. You can also drape a door or tall furniture with a white sheet to bounce light off of.

A white reflector on a stand is a better solution, position it anywhere. In tight quarters attach DIY plastic reflectors to walls. The camera should usually be 3-10 feet from the bounced surface. Rotate the speedlight’s head to the perfect bounce angle(similar to a bank shot in billiards).Remember, the closer the distance between speedlight and bounced surface, the harsher the light will be.

DIY Lightweight Plastic Reflector

flash bounce reflector

4’x4’ white plastic DIY hanging reflector (only weighs 5 oz.)

  • Buy a large rectangular 54” x 108” plastic tablecover (under $2.00) at a party supply store.
  • Fold it in half and tape together with two-sided heavy duty tape (carpet tape).
  • Temporarily attach it to a wall with the same stuff – careful not to do any damage! Remove slowly!

Lighting a Subject with a Complicated Background

The best way to evenly light a background is by bouncing light off a white ceiling.

complicated background flash lighting

Five Speedlights Used: See Setup Details Below

Use snoots to shield direct light from striking your subject(s) and visible background.

diagram for bouncing flashA. On camera “Master” speedlight (set on manual) rotated and bounced off a white reflector for fill light. Light set at ½ power.

B. Speedlight placed into an Umbrella Softbox for the main light. Set at ½ power.

C.D.E. Speedlights were positioned out of camera frame with short snoots attached and aimed upward bouncing light off the white ceiling. Lights provided background and accent lighting. All three lights set at full power.

-100mm lens, ISO 400, WB 6000K, F7.1 x 1/200th sec.

Lighting Ratio

A lighting ratio is the comparison of the main light to the fill light. The light from your speedlight can be either. When the flash is brighter than the existing (ambient) light it becomes the main light and the ambient light is the fill. When your flash is less bright that the ambient the reverse happens (flash = fill ; ambient = main).

A photograph is more dramatic when the main and fill light are not the same brightness. The greater the difference between the two, the higher the lighting ratio (more contrast).

Bouncing light usually creates a large light source. Sometimes too large! Super large light sources can create flat, boring light (like an overcast day).Move your flash closer to the bounce surface to increase the contrast (higher lighting ratio).

Don’t bounce your flash directly behind you, except for fill light. Angle it to your left or right, side lighting your subject.

Lighting in Tight Quarters

flash lighting in tight quarters

One On-Camera Speedlight Used: 16mm lens, F8 x 1/50 sec., ISO 800, WB 6000K. Light bounced behind the camera into a 4’ x 4’ white plastic DIY reflector. Shutter dragged @ 1/50 sec. to back light the subjects. Built- in wide panel pulled over front of flash head for maximum light spread.

No Hot Spots

Another problem (especially noticeable when shooting with a wide angle lens) is hot spots in the image area (blown out white areas where direct flash is striking). The simplest solution is to crop them out of the photograph. This is easier to do when using medium and longer focal length lens.

Dog-gone-it! Sometimes you just have to shoot wide. Wide angle shots can be very dramatic. The problem is that lots of background shows in the frame. How do you hide the hot spots? The answer is to control the shape of the light you are creating.

You can zoom your flash to its longest focal length, flag the light with something opaque or snoot your speedlight. The best solution is usually snooting. Zooming is less precise and flagging requires cumbersome equipment and takes forever (unless you just flag the speedlight.)

A snoot is a tube shaped light control device placed on the end of your speedlight. It creates a circle of light with defined edges. Snoots are easy to make. Buy 2 mm thick black craft foam and give it a try. The longer the snoot, the smaller the circle of light. It needs to be loose enough to slide up and down but tight enough not to fall off easily.

Speedlight Modifiers Used in Sample Photos

flash speedlight modifiers

Left – DIY Snoot; Middle – white/silver 60” pop-open reflector; Right – umbrella softbox

Dragging the Shutter

dragging the shutter

Two Speedlights Used: 70mm lens, F6.3 x 1/60 sec., WB 6000K

  • Off camera speedlight bounced off ceiling behind subject. Speedlight set to ¼ power. It created background & hair light.
  • On-camera speedlight rotated and bounced into light gray wall behind the subject. Speedlight set to 1/8 power. It created the fill light. No color cast since the wall was gray.
  • Slow shutter speed (1/60 sec.) correctly exposed the x-rays and created the highlights on the doctor’s face and hand. This is “Dragging the Shutter”.
  • Camera attached to a monopod for stability.

Creating a Lighting Ratio in Flat Open Shade

flash lighting ratios

One On-Camera Speedlight Used: 155mm lens, F5.6 x 1/160 sec., ISO 400, WB 7000K

A. Pop-open white reflector was leaned against a lightstand approximate 6 feet from the cat.

The on-camera speedlight was set to ETTL+1, head rotated and aimed at the reflector. A 4 ½” snoot was attached to prevent direct light from striking the cat.

bounce lighting diagram

The bounced light created a nice lighting ratio adding interest to the flat lighting of open shade.

About the author:
John Rogers is an award winning photographer in Boise, Idaho and owner of prolightsecrets.com.
Go to full article: How to Bounce a Flash: Professional Guide

What are your thoughts on this article? Join the discussion on Facebook or Google+

Article from: PictureCorrect Photography Tips

Copyright © 2003-2012 PictureCorrect, Inc. All Rights Reserved.